
Built Together.
Your Offroad Partner.
Your Offroad Partner.
Your Offroad Partner.
Your Offroad Partner.

For your Ford Bronco, choose ditch lights only after matching the brackets to your exact model year, confirming hood clearance, and checking the wiring against the selected switch circuit. A light-and-bracket bundle does not establish that the harness, fuse protection, or switch connection is included or correct for your vehicle; use the checks below before ordering or installing a 2026 setup.
A-pillar lights put auxiliary illumination near the windshield corners. That position makes bracket clearance, cable routing, and reflected light important—not just the lamp's output. A setup that illuminates the hood instead of the trail needs an aiming change, not automatically a brighter light.
Iron Ridge Offroad serves truck and SUV owners shopping for aftermarket off-road lighting. For a daily-driven Bronco, select the lighting function you need first, then verify the hardware and electrical connections that support it.
Keep factory road lighting and trail lighting as separate buying decisions. Ditch lights should address a specific visibility need without creating loose wiring, obstructed hood movement, or glare from nearby bodywork.
Check the vehicle application, mounting hardware, beam pattern, harness contents, and switch requirements before placing an order. For a 2026 Bronco, an older product URL or a general Bronco label is not enough: the current application information must include your vehicle.
| Configuration | Best for | Practical advantage | Trade-off or required check |
|---|---|---|---|
| TYRI Off-Road Lighting 1010 A-Pillar Light Kit with Mounting Brackets Ford Bronco, listed for 2022–2026 | Buyers comparing a Bronco-specific light-and-bracket package | The supplied listing identifies lights and mounting brackets together | Confirm trim compatibility, beam details, harness contents, and switch requirements separately |
| Separate lights and vehicle-specific brackets | Buyers choosing a particular beam or lamp housing | Lets you select the lamp and mount independently | You must verify mounting interfaces and clearances between components |
| Existing lights with replacement brackets | Owners retaining serviceable lamps | Keeps the existing lights in the build | Existing hardware, wiring condition, and lamp compatibility still need inspection |
The store's listing identifies the TYRI kit's model-year application and mounting brackets; it does not establish every installation detail. Treat a bundle as a shorter shopping list, not proof that every connection is covered. Confirm the contents before buying additional components or assuming you do not need them.
Record your Bronco's model year, trim, and existing accessories. Identify any equipment already occupying the proposed mounting area, including accessory brackets or wiring. Give those details to the seller when checking compatibility.
Do not extend fitment between Bronco variants because the names look similar. A model-year range also does not resolve every trim or accessory conflict. Match the product's current application notes to the actual vehicle, not a photo of another owner's installation.
Decide whether you need illumination beside the trail, farther ahead, or around a slow-speed obstacle. Beam pattern and aiming determine where the light goes; an output figure alone does not answer that question.
For a commuter that sees occasional trails, avoid buying a larger housing solely for its appearance. Choose the beam for the visibility problem, then choose a bracket that supports that lamp.
Bronco ditch-light brackets must match both the vehicle attachment points and the lamp's mounting interface. Confirm the bracket application, lamp mounting arrangement, supplied hardware, and installation instructions before loosening vehicle fasteners.
A bracket described as vehicle-specific still needs a clearance check with your selected light. Housing shape, adjustment hardware, and cable exits all affect the installed assembly. Check the full assembly rather than the bare bracket alone.
Do not use the hood as a clearance test by closing it forcefully. If the assembly interferes, stop and resolve the fitment problem instead of bending components or adding unapproved spacers.
Your Bronco uses a 12-volt electrical system, but system voltage alone does not establish that a lighting circuit is suitable. The lamp's electrical requirements, harness rating, fuse protection, and switching arrangement must work together. Disconnect power as directed by the vehicle and lighting instructions before making connections.
Trace the proposed installation from power source to lamp before routing anything permanently. Identify each component's function rather than connecting wires by color alone; wire colors are not a universal compatibility standard.
These checks belong together. A connector that plugs in does not prove the circuit has the required electrical capacity, and a functioning switch does not prove the wiring is protected correctly.
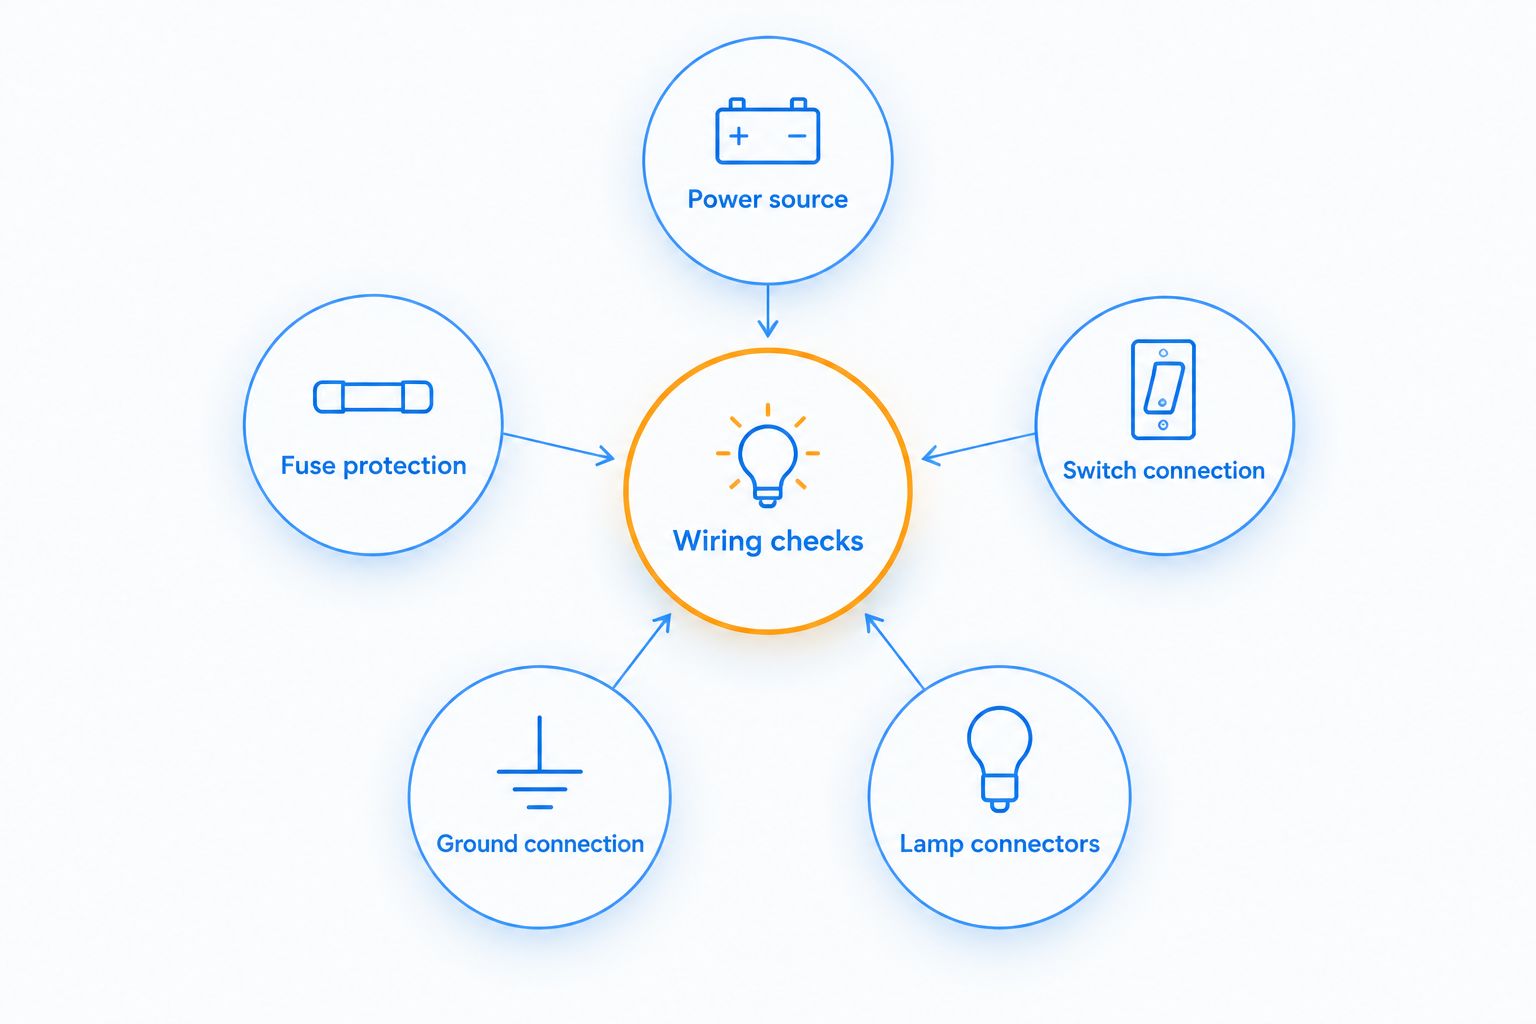
Keep wiring away from hot surfaces, sharp edges, and moving parts. Protect it where it passes through an opening, and use the harness manufacturer's recommended securing method. A cable should not depend on a hood seal or closed body panel to hold it in place.
Allow the movement required at the light and hood without leaving loose loops that can snag. Check the cable at both ends of hood travel. Also leave access to service points rather than burying a connection beneath unrelated accessories.
For your 2026 installation, photograph the completed routing and record the fuse and harness specifications from their instructions. That reference makes later inspection easier without relying on memory or an unlabeled wire.
Use factory auxiliary switches only after confirming the selected circuit's rating and connection instructions. A switch is a control point, not blanket approval for any lamp load. Consult the owner's manual for your exact Bronco and the lighting manufacturer's wiring diagram.
If your Bronco lacks factory auxiliary switches, choose a switching arrangement specified for the lights. Do not copy an auxiliary-switch installation onto a vehicle with different equipment.
| Switching arrangement | Best for | Benefit | Limitation |
|---|---|---|---|
| Factory auxiliary-switch circuit | Owners with the applicable factory equipment | Uses an existing vehicle control | Circuit capacity and connection method require vehicle-specific verification |
| Dedicated switched harness | Owners needing a separate lighting control | Provides a defined wiring arrangement when correctly matched | Requires suitable switch placement and harness routing |
| Relay-controlled harness | Installations whose instructions specify relay switching | Separates the control connection from the lamp-power path | Adds connections that must be wired and protected correctly |
A harness can use a small control connection to operate a relay while another connection supplies the lamps. Another arrangement can switch power directly. Follow the actual diagram; do not combine those approaches by assumption.
If a connector or wire's function is unclear, stop before energizing the circuit. Ask for the correct diagram or use a qualified installer. Guessing at a control wire can damage equipment even when the lights appear to work initially.
Test the intended switch behavior according to the vehicle and harness instructions. Confirm whether the lights operate in the intended ignition state and whether they remain off when the control is off.
Label the control clearly enough that another driver understands its purpose. For a daily-driven Bronco, accidental activation of trail lights is a usability problem as well as an aiming concern.
There is no single bracket-and-harness combination for every Bronco installation. The correct setup depends on these checks:
For a 2026 buying decision, compare those requirements before comparing appearance. A smaller lamp with the appropriate beam and clear installation requirements is a better choice than a larger lamp that creates an unresolved mounting conflict.
Aim Bronco ditch lights in a controlled location away from public traffic, following the lamp manufacturer's instructions. Inspect the illuminated area from the driver's seat and check for distracting reflection from the hood or nearby bodywork.
Adjust the lights individually so you can identify which lamp creates a reflection or leaves the intended area unlit. Secure the adjustment hardware as directed, then recheck the beam. Do not compensate for poor aiming by adding more lights.
Reject an aim setting that makes nearby bodywork brighter without improving the intended view. Keep off-road-only lighting off on public roads, and check applicable state and local requirements before road use.
Check Bronco ditch lights against the wiring diagram before replacing parts. With power disconnected as instructed, inspect the fuse, connectors, grounding connection, and switch wiring for the affected circuit.
| Symptom | First check | Avoid |
|---|---|---|
| Neither light operates | Shared power, fuse, ground, and control connections | Assuming both lamps failed |
| Only one light operates | That lamp's connector and wiring branch | Disturbing every working connection immediately |
| Operation changes with hood movement | Cable tension, pinching, and connector security | Continuing to cycle a cable that is being damaged |
| Fuse repeatedly opens | Circuit faults and the specified protection requirements | Installing a higher-rated fuse |
| Light reaches the hood instead of the intended area | Beam selection and aiming | Buying additional output before correcting the aim |
Stop using the circuit if you find damaged insulation, melted components, or repeated fuse failures. Resolve the cause before reconnecting power; replacing the fuse alone does not repair a fault.
Do Bronco ditch lights fit every Bronco trim?
No—Bronco ditch-light fitment requires an exact application check. Verify the model year, trim, bracket requirements, and any conflicting accessories before ordering.
Can I connect Bronco ditch lights to factory auxiliary switches?
You can use a factory auxiliary-switch circuit only when its rating and connection method match the lighting installation requirements. Check the owner's manual and the harness diagram for your exact vehicle.
Does a Bronco ditch-light kit include all the wiring?
A kit name does not establish that all wiring is included. Check the contents for the harness, required connectors, fuse protection, and any specified switching components.
Are brighter Bronco ditch lights always better?
No—beam pattern and aiming determine whether the light reaches the area you need to see. Additional output does not correct hood reflection or an unsuitable beam.
Should I use a relay with Bronco ditch lights?
Use a relay when the lighting and harness instructions specify one. Determine whether the switch connection supplies lamp power or controls a relay before connecting wires.
Can I leave ditch lights on while driving on the road?
Keep off-road-only ditch lights off on public roads. Check the selected light's documentation and applicable state and local rules before any road use.
What should I check after installing Bronco ditch lights?
Check hood clearance, cable movement, fastener security, switch operation, and beam aim. Repeat the inspection after initial use according to the product instructions.
Open the hood after the installation is finished—not just while positioning the brackets. Final cable ties and connector placement can change how the harness moves. A light that clears the hood is not enough if its wiring pulls tight underneath it.
Iron Ridge Offroad's off-road lighting selection is relevant to Bronco owners comparing vehicle-specific upgrades; the final choice still depends on confirmed fitment and electrical requirements. Before ordering for 2026, write down the exact vehicle application, bracket, harness, and switch arrangement so each component has a defined role.