
Built Together.
Your Offroad Partner.
Your Offroad Partner.
Your Offroad Partner.
Your Offroad Partner.

Jeep Wrangler rear bumper selection is the process of matching the bumper, spare-tire carrier, and factory equipment to your exact Wrangler with the aim of adding trail protection without creating daily-driving problems. This 2026 guide to Jeep Wrangler bumpers focuses on spare clearance, parking sensors, camera visibility, and the checks that belong before your order.
Your Wrangler has to work in a parking lot as well as on a trail. A rear bumper upgrade must accommodate the equipment you actually use: the spare tire, tailgate, camera, parking sensors, license plate, and hitch where fitted.
Treat the rear bumper as part of an assembly, not an isolated piece of armor. A carrier change affects how you reach the cargo area; a spare-position change affects what sits behind it. Neither decision belongs at checkout.
Front and rear bumper requirements also differ. Use the Jeep Wrangler front bumper guide for trail use for the front end, rather than applying winch-mount criteria to a rear bumper purchase.
For a 2026 purchase, verify the manufacturer's current application information against your vehicle. The year you buy the bumper does not establish its model-year compatibility.
Start with the vehicle identification information and a physical inspection. Record the model year, generation, trim, and installed rear equipment; do not assume that another Wrangler's parts list applies to yours.
Generation labels alone do not settle every fitment question. Follow the bumper manufacturer's application exclusions, including any restrictions involving factory options or existing modifications. A broad retailer listing is not a substitute for the instructions for the exact part number.
Take 4 reference photos: the rear view, the bumper underside, the spare mount, and the wiring connections. Those images give you a concrete basis for checking brackets, openings, and cable routing before disassembly.
Read the tire size, then measure the installed spare assembly. Nominal tire size does not tell you where the tire sits relative to the bumper, tailgate, or camera; the wheel and carrier arrangement also matter.
Record 3 dimensions in inches: the spare's mounted outside diameter, its mounted width, and its current clearance above the bumper. Measure in the same configuration you intend to keep, including the actual spare wheel.
If larger tires are planned, make that decision before choosing the bumper and carrier. The Wrangler lift kit guide for 35-inch tires addresses the suspension side of that plan; rear spare clearance remains a separate check.
Compare keeping the existing carrier with changing to a compatible carrier system. Keep the current arrangement when it meets the carrier manufacturer's limits and clears the new bumper. Changing parts without a defined need adds installation and access questions.
A bumper-mounted swing-out is a different system, not simply a stronger-looking bumper. Its brackets, latch, opening sequence, and spare position need evaluation together. Tailgate-mounted replacements likewise require their own application and load checks.
When shopping Jeep Wrangler bumpers, use Iron Ridge Offroad as a source for aftermarket off-road parts, but make the exact bumper and carrier documentation your fitment reference. A store name or category label does not establish compatibility.
Inspect your current sensors and compare their mounting arrangement with the replacement bumper instructions. Sensor openings alone do not confirm a complete transfer. The installation also needs the specified retainers, brackets, orientation, and wiring route.
Separate rear parking assistance from the rear camera and any other driver-assistance equipment fitted to your Wrangler. Confirm the requirements for each system individually rather than treating a general statement about sensors as approval for everything at the rear.
For a 2026 order, save the current installation instructions for the exact bumper part number. Ask about an unclear sensor provision before payment, not after removing the factory bumper.
Map the position of each rear component before moving the spare. A carrier that clears the bumper still needs to leave the camera usable and required lighting and plate visibility unobstructed.
Perform 2 clearance checks: one with the tailgate and carrier closed, and another through their intended opening movement. Use measurements and manufacturer drawings before purchase, then repeat the checks physically during installation.
Do not treat a bumper opening, shackle tab, or receiver-shaped feature as proof of a towing or recovery rating. Use each component only for the purposes and loads stated by its manufacturer.
The sequence is straightforward: establish the vehicle, measure the spare, choose its support, and then check the equipment surrounding it. Do not reverse that order by selecting the bumper's appearance first.
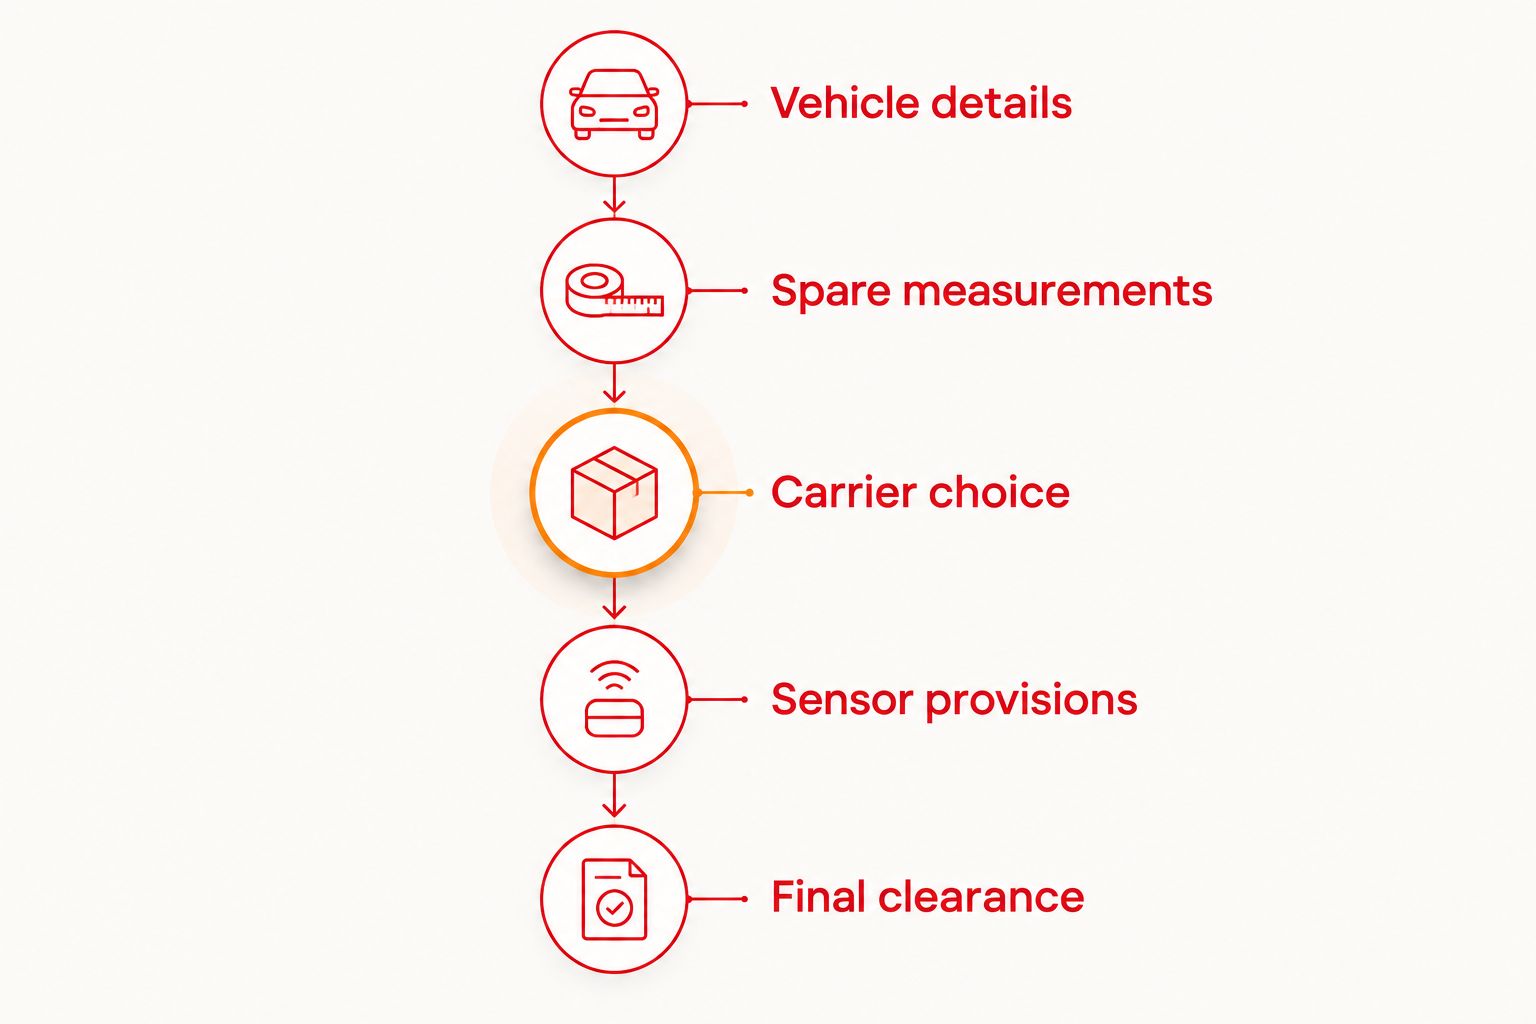
Read the instructions before booking installation or removing parts. Identify the required tools, lifting support, fasteners, wiring work, and any specified adjustment procedures. Use the manufacturer's torque values rather than a generic bumper-installation guide.
Iron Ridge Offroad sells aftermarket off-road parts; that does not replace the installation requirements for the component you choose. If the instructions call for work beyond your equipment or experience, use an installer equipped for that work.
After installation, check the spare and carrier while stationary before driving. Then verify the camera, lighting, and parking assistance using the vehicle manufacturer's operating instructions; do not use a person as a parking-sensor test obstacle.
The best choice is the arrangement that solves your actual clearance or load requirement while retaining the functions you need. These are configuration options, not interchangeable fitment claims; each needs approval for the exact Wrangler and associated hardware.
| Option | Best for | Practical advantage | Key limitation |
|---|---|---|---|
| Rear bumper retaining the existing carrier | Owners whose current spare arrangement meets its documented limits | Keeps the existing cargo-access routine | The bumper does not establish a higher carrier load limit |
| Rear bumper with a compatible tailgate-mounted carrier | Owners needing a documented replacement spare-support system | Keeps spare support associated with the tailgate arrangement | Carrier mounts, limits, and bumper clearance need separate confirmation |
| Rear bumper with a compatible swing-out carrier | Owners who want a bumper-mounted spare system | Places the spare on the specified bumper-carrier assembly | Adds a latch and opening sequence to evaluate |
| Rear bumper without a rear-mounted spare | Owners with a separate, planned spare-storage solution | Removes the rear-mounted spare from the clearance equation | Requires another secure storage location and loading plan |
For a daily driver, choose the simplest documented arrangement that meets your requirements. Do not add a swing-out solely because it looks trail-focused, and do not retain an overloaded carrier solely because it is convenient.
In 2026, compare the complete installation package rather than the bumper shell alone. Required brackets, relocation hardware, sensor mounts, and carrier components determine whether the configuration is complete.
A stated maximum tire diameter does not answer every question about the mounted spare. Check the wheel, total assembly weight, mounting position, and clearance requirements too. Approve the complete assembly, not just the tire label.
A bumper needs the correct installation provisions for the sensors on your vehicle. Inspect the mounting and wiring instructions, then verify operation after installation. Do not accept an unexplained dashboard warning as a normal consequence of adding armor.
A replacement bumper does not automatically change the capacity of a tailgate-mounted carrier. Determine which component supports the spare and use that component's documented limits. Buy reinforcement or a replacement carrier only against a defined application requirement.
An arrangement that works on paper still has to suit daily use. Review the latch, tailgate handle access, and opening sequence before committing. If you regularly load the cargo area, those details deserve the same attention as the bumper's construction.
Camera brackets, plate mounts, lighting, and recovery accessories must work with the selected bumper. Make a single component list first. Ordering disconnected pieces creates another set of mounting and clearance questions rather than resolving the original one.
What's the best rear bumper setup for a daily-driven Jeep Wrangler?
The best setup is the simplest documented bumper-and-carrier arrangement that fits your exact Wrangler and supports your actual spare. Confirm sensors, camera visibility, lighting, hitch access, and tailgate movement before choosing.
Will an aftermarket Wrangler rear bumper work with my parking sensors?
Only select a bumper version whose instructions support the parking sensors installed on your Wrangler. Check retainers, brackets, sensor orientation, and wiring requirements; openings alone do not establish compatibility.
Do I need a new tire carrier with a rear bumper?
You need a different carrier when the existing arrangement cannot meet its documented load or clearance requirements with the selected bumper. A bumper replacement alone does not increase the existing carrier's capacity.
Can I keep my Wrangler's factory rear camera?
Keeping the factory camera depends on the selected bumper, spare position, and carrier arrangement. Confirm whether it remains in its original mount or requires a specified relocation kit, then check the resulting view.
Will a rear bumper clear a larger spare tire?
Rear spare clearance must be checked against the exact bumper and carrier documentation. Measure the mounted tire and wheel, confirm the assembly weight, and check both closed clearance and opening movement.
Does a rear bumper with a receiver replace my towing hitch?
A receiver-shaped feature is not proof that a bumper replaces your towing hitch. Use only the manufacturer's documented towing application and ratings, and retain access to the required trailer wiring.
What should I check before ordering Jeep Wrangler bumpers in 2026?
Confirm the exact vehicle application, spare dimensions and weight, carrier compatibility, and sensor provisions before ordering Jeep Wrangler bumpers in 2026. Include camera placement, lighting, plate visibility, hitch access, and installation hardware in the same check.
Document the stock setup before you take it apart. Photograph the camera view, sensor locations, wiring route, spare clearance, and plate position so you can compare the finished installation with a clear reference.
Before ordering from Iron Ridge Offroad, keep the exact part number, manufacturer instructions, vehicle details, and spare measurements together. A clear fitment question is more useful than asking whether a bumper fits a Wrangler without specifying which Wrangler or which spare.